A Map for Your Novel: One to Draft With, One to Print
Somewhere around chapter twelve, most novels with a journey in them develop a quiet problem. The ride that took four days on the way out takes two on the way back. The river that ran west of the capital now runs east of it. A character arrives somewhere before the letter that summoned her could have. Readers notice these things, and so will you, usually during revision, usually at the worst moment. A map fixes it, but a map for a novel is really two different things: a working map you draft with, and a finished map you might print in the book. They have different jobs and they get made at different times. Here is how to make the first one useful and how to tell whether you need the second.
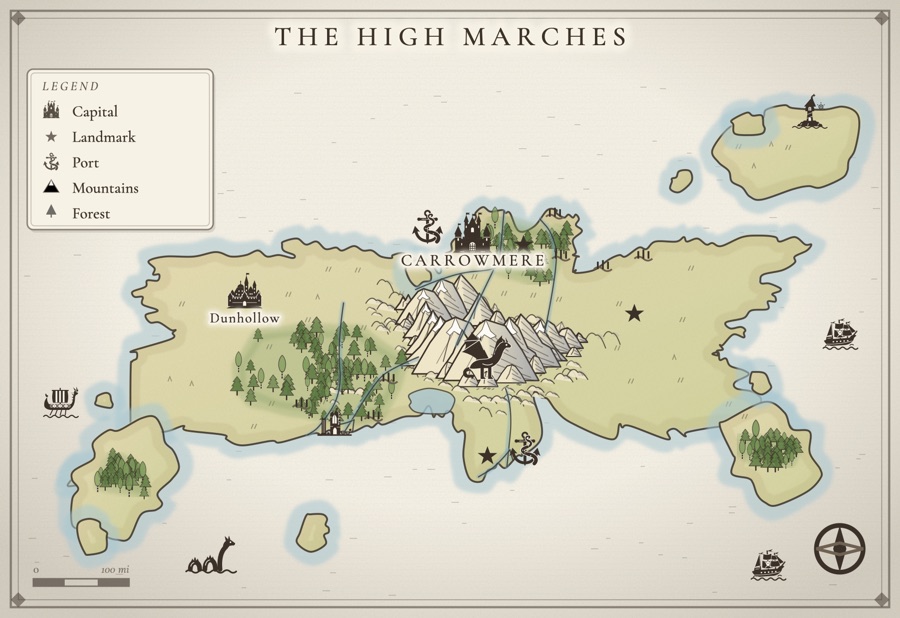
Pick a stamp, tap the realm to drop it, drag it into place, double-tap to name it.
Two maps, two jobs
The working map is for you. It can be ugly, half-labeled and covered in notes, because its only job is to stop the story from contradicting itself. The print map is for readers. It has to be clean, legible at the size of a paperback page, and true to the finished book, which means it cannot be finished until the book is. Plenty of authors make the first kind and never the second, and a good number make both. The Book Designer's guide to fantasy world maps draws the same line, between a map made for your own reference while writing and one included so readers can follow the geography, and suggests waiting until the final draft before making the one that goes in the book. That is the right instinct. Draft with a rough map, publish with a finished one.
What a working map does for your draft
A working map is a continuity tool first and a creative one second. Here is what it catches:
- Travel times. Decide how far your characters can go in a day on foot, on horseback and by ship, write it down once, and measure every journey against the map. Most timing errors in a draft are really distance errors.
- Distances between scenes. If a messenger can reach the capital in a day, so can an army. The map tells you which of your plot's conveniences the story has to pay for.
- Weather and seasons. Mountains, coasts and latitude decide where it rains and where it snows. If your heroes go north for three weeks, the map reminds you they should be colder when they get there. Our guide to realistic fantasy map geography covers rain shadows, rivers and where forests grow.
- Borders. Who controls the bridge, the pass and the port matters to the plot. Draw the borders and you can see where a character crosses into danger.
- Where scenes happen. Pinning each scene to a place shows you which parts of the world carry the story and which are scenery you never use.
- Continuity across chapters. The inn is on the north road. The tower is on the east bank. Write it on the map once and you never have to search chapter four to find out again.
When to make it: before, during or after the draft
There is no single right time, but there is a right time for you, and it depends mostly on how you draft. If you are not sure which camp you are in, our guide to pantser vs plotter will help you find out.
Plotters tend to sketch the map before the first chapter, because the route is the plot: the journey from the farm to the dark tower is the outline. Keep that first map rough. Mark the places the outline visits, the obstacles between them and a scale, and stop there.
Pantsers usually do better drawing the map as they go. The first time a scene arrives somewhere, put that place on the map and write one line about it. By the end of the draft you have a map of the world the story actually needed, not the one you imagined before you knew the story.
After the draft, everyone should do the same thing: read the manuscript against the map. Revision is when places get merged, moved and renamed, and it is the last chance to fix a journey before readers find it. Only after that pass is it time to think about a map for print.
Keep the map and the manuscript in step
A map drifts out of date the same way a character profile does: the draft changes and nobody updates the reference. A few habits keep them together.
- One map is the source of truth. Not a sketch in a notebook and a different one in a folder. When they disagree, you will trust the wrong one.
- Every named place goes on the map. Keep a running list of the places the draft names and check it against the map at the end of each act. A place that is in the book but not on the map is where contradictions start.
- Notes live on the place. Which chapter it first appears in, who lives there, what happened there. When the note sits on the map, checking a fact is one glance.
- Change the map the same day you change the draft. If you move the battle from the river to the hills, move it on the map before you close the file.
If your book follows several narrators, the map also shows you where each one is at any moment, which is half the work of keeping parallel storylines honest. Our guides on writing a multiple POV novel and tracking a novel's timeline pair well with a map for exactly that reason.
Naming places so readers can keep them straight
The craft of naming is covered in our guide on how to make a fantasy map, so here is only the part that matters for continuity. Give places that appear in the same chapters names that start with different letters and have different shapes, so a reader skimming does not confuse Varrow with Vellow. Decide each spelling once and keep it with the map, and if the draft ever disagrees with the map, fix the draft. Name the places your story visits and leave the rest unlabeled until a scene needs them.
Showing the map to beta readers
A working map is full of spoilers. The ruined keep where the twist happens, the city that only appears in the last act, the island nobody is supposed to know about. Before you share the map with beta readers or a critique partner, make a reader copy that leaves those off, so their reactions to the story are not shaped by a map that gives it away.
Does your book need a printed map?
Not every novel with a world needs a map in the front. A printed map earns its page when:
- the story is a journey through many places and readers will want to know where they are;
- the politics depend on territory, so who holds what is part of understanding the plot;
- there are enough place names that a reader would flip back to check one.
It can usually be skipped when the story stays in one city or a few locations, or when the places are easy to hold in your head. A map also has to be good enough to sit in a finished book, legible in black ink on a small page, which is its own piece of work. When you get there, our guide on how to get your fantasy map ready for print covers trim sizes, resolution, black-and-white printing, ebooks and licensing.
- A map saved as an image in a folder, nowhere near the draft
- A place-name list in a spreadsheet you forget to update
- Notes about each place scattered through a separate doc
- A second, cleaned-up copy of the map for beta readers
Separate subscriptions, separate logins, and none of them talking to each other.
- All of it on one desk, right beside your draft
- One login, one place, nothing to sync
- One simple price, and 14 days free to try it
How Inkling connects the map to your draft
Inkling is a writing desk with a map maker built in, so the map sits beside the story it belongs to. Here is what links them today:
- Maps beside the page. Save a map to a story and it appears in that story's Maps panel, one click from the chapter you are writing.
- Write a story here. Every kept map has a Write a story here button. It starts a new story named after the map, with the places you named already listed in its notes, and moves the map onto that story.
- Places in your story. Pick a story under the map and press Read my story for places. Inkling lists every named town, castle, ruin and land in the draft, shows how many are already on the map, and lets you add the missing ones one at a time or all at once. Reading again marks anything new. It only reads when you press the button, and it uses the generator, which you can switch off in Setup.
- Cast & places. Inside the writing desk, the Cast & places panel keeps the characters and places of the story you are drafting beside the page. Add them by hand, or have the generator pull them from the draft.
- Notes on each place. Select a place on the map and write what happens there. Only you see these notes. They stay with the map and are never drawn on it or exported.
- Secret places and a spoiler-free copy. Tick Secret on any place, and the Download menu offers a Spoiler-free copy: the same picture without your secret places, ready for beta readers.
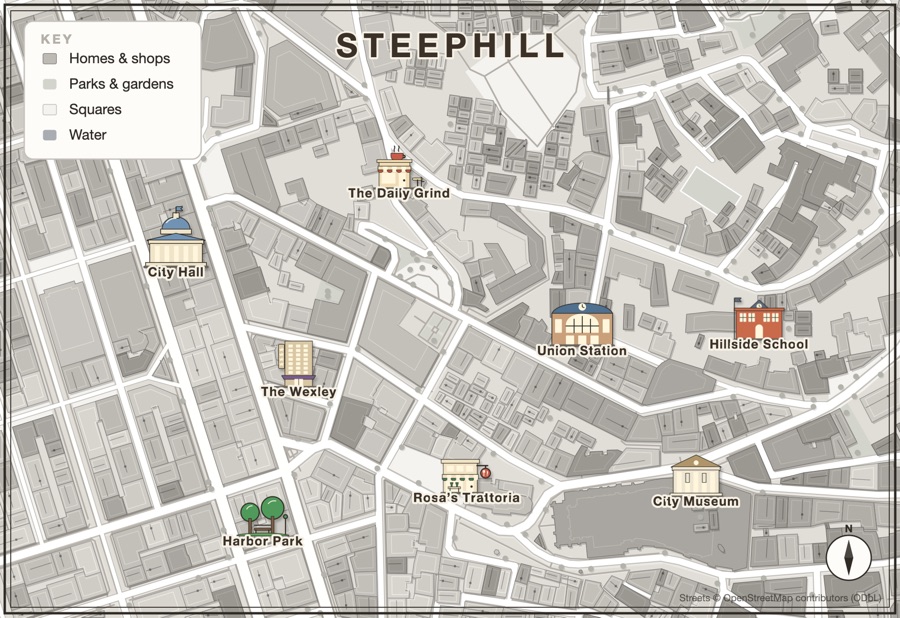
- Linked city maps. Double-click a town on your world map and its own city map opens, already named and linked back to the realm, so a book that moves between a kingdom and its capital keeps both maps together.
What is free and what is not: anyone starting out, including during the free trial, can keep 2 maps and download 2 pictures, which carry a small Inkling credit. Notes, secret places, the spoiler-free copy (it counts as one of those downloads) and Places in your story all work on the free maps. A Map Pass ($29 a year or $4 a month) or a paid Plus subscription ($9 a month) keeps every map, removes the credit, unlocks print and poster sizes and the SVG file, and opens linked city maps. Write a story here starts a real story, so during the trial it counts toward the 3 stories you can start. The trial itself is 14 days to experience the full writing desk, build worlds, and be creative. No card to start. If you want to see the writing side first, the Storyboard and character cards are where most of a novel gets planned, and pricing has every plan in one place.
A few questions, answered
How do I make a map for my novel?
Start with only what your story touches: the places scenes happen, the routes between them, and the barriers in the way (mountains, a sea, a border). Decide a rough scale so you know how far apart things are, then mark each place as it appears in the draft. You do not need to draw. A map maker that handles the artwork lets you place, drag and name things, and you can keep the map beside your manuscript so checking it takes a second instead of a search.
Do I need a map in my fantasy novel?
You almost certainly want one for yourself while drafting, because it keeps travel times, directions and borders consistent. Whether the published book needs one is a separate question. A printed map earns its page when readers follow a journey across many places, or when politics depend on who holds which territory. A story set in one city or a handful of rooms can usually skip it, or use a simpler one.
How do I make a map that matches my story?
Let the draft lead. Pull a list of every place your story names, put each one on the map, and note on the map what happens there and in which chapter. When the draft changes a place, change the map the same day. If you make the map before drafting, read it back against the manuscript after each act, because stories move places around as they grow.
Should I make my map before or after writing?
Plotters usually sketch a rough map before drafting, because routes and borders shape the plot. Pantsers often do better drawing the map as they go, adding each place the first time a scene visits it. Either way, keep it rough until the final draft. The polished map for print should come last, once the story has stopped moving things around.
How do I show beta readers my map without spoilers?
Make a reader copy that leaves off the places that give the plot away: the hidden fortress, the city that does not exist yet, the place someone dies. In Inkling you mark a place as secret and download a spoiler-free copy of the map without it, while your own working map keeps everything.
All of it. In one place.
This isn't five apps stitched together. Your storyboard, your cast, your maps, your covers, and the story itself all live on one desk, right beside the words. Nothing to sync between tools. No five separate subscriptions. Just everything a writer needs, finally in the same place.